All the essentials you need to know to get started with the Masking Master
Welcome to this guide on how to use the Masking Master for the first time! The Masking Master is an innovative and versatile masking tape applicator that allows for easy and precise masking of surfaces for painting, caulking, and other projects. This all-in-one tool is perfect for both beginner and experienced painters who want to achieve professional-looking results quickly and efficiently.
In this article, we will guide you through the steps to set up and use the Masking Master for the first time. We will cover everything from loading the tape to applying it on surfaces, and offer tips and tricks to help you get the most out of your masking tape applicator. So, let’s get started and learn how to use this versatile tool like a pro!
Guide
Step 1
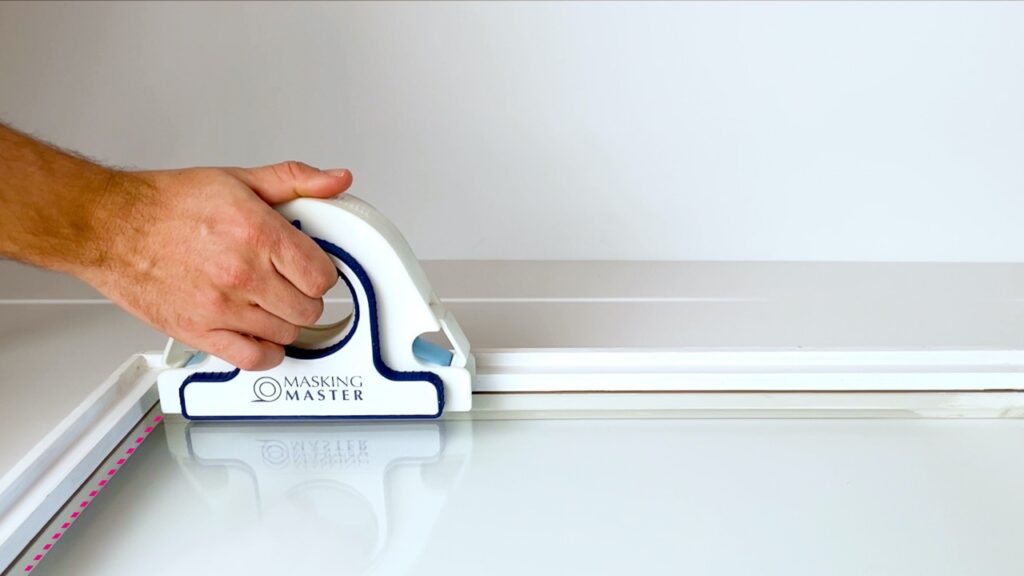
Place the Masking Master at ±1cm or ±0.5 inches of the starting point. The dotted line indicated in the image should be enough!
Step 2
Make sure you’ve positioned the Masking Master with the flat side against the surface you’re going to paint. To help you we’ve included some indicators market in the image. 5 stripes on the starting side and 10 stripes to the end direction.
Step 3
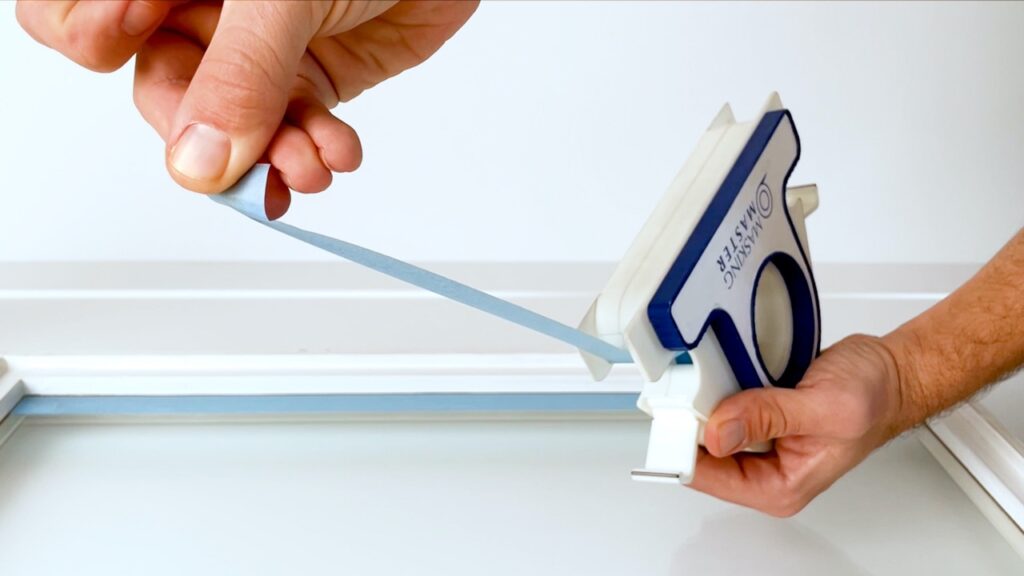
First, move the Masking Master back against the starting point. This creates tension on the masking tape and ensures a precise cut.
Step 4
Slide the actuator to the starting point to cut the tape. This should go as smooth like butter!
Step 5
Now, we’re going to slide the Masking Master to the other side. It’s important not to apply downward pressure, as this will only make it harder to move the Masking Master forward. This can cause loss of control and may result in inconsistent tape lines.
Step 6
Instead, push the Masking Master forward without applying too much force. While doing this, make sure the Masking Master stays aligned with the surface you’re going to paint or caulk at all times.
Step 7
When you’ve reached the end, use the actuator to cut the tape.
TIP: When you don’t have an edge at the end, make sure that you don’t apply forward pressure. This will cause the Masking Master to shoot forward after cutting the tape and creates a messy cut.
Step 8
Remove the Masking Master from the surface and set it aside. As you can see, both tips of the tape aren’t attached yet. In fact, the whole length of the tape isn’t really attached yet…!
Step 9
Take out the Masking Master spatula and press the masking tape down firmly. Especially along the edge that is aligned against the surface you’re going to paint. You don’t want any paint to ‘bleed’ underneath!
Step 10
Now, take out the Masking Master again for the next run. Open up the tension lever on the left and remove any tape residue.
Step 11
Open up the tension lever on the other side so that you can grab the masking tape that’s sticking out.
Step 12
Pull the masking tape out to a length of roughly the length of the Masking Master and then a bit more!
Step 13
Loop the tape underneath the Masking Master to the other side.
Step 14
Hold the tape underneath the tension lever and flip the tension lever down. Flip the tension lever on the other down as well. Do a quick check if the masking tape is aligned with the thin side!
This website uses cookies to optimize your experience.
We just use geolocation and traffic data, so that we can adjust our website to your needs. All data is anonymously stored and analyzed. Read more about is in our Privacy Policy
This website uses cookies to optimize your experience.
We just use geolocation and traffic data, so that we can adjust our website to your needs. All data is anonymously stored and analyzed. Read more about is in our Privacy Policy